Microsoft has released Windows 11 and you can download it on your PC if you are using a licensed version of Windows 10 and the device meets all the system requirements listed by Microsoft.
This process would be considered an "In place upgrade" and is not advised as it often causes problems with software/services/drivers. With that said, we have had success lately with the upgrade process. Here are the instructions:
1. Open Windows Settings and go to Updates & Security.
2. Click on Check for updates to check for the available updates.
3. You will be able to see an update named Feature Update to Windows 11. Click on Download and Install to get it and upgrade to Windows 11.
Update image
4. Doing this will instantly show you Preparing Windows 11.
5. Windows 11 Setup window will appear, click Next to continue.
6. Application Notices and License terms window will appear, click Accept to continue.
7. Next, you need to wait until the “Ready to Install Windows 11” dialog appears. Here, you can click the “Change what to keep” link to customize the installation of Windows 11.
Under this, you will find three options:
- Keep Personal files and apps – You will be able to manage settings
- Keep Personal files – Your settings and apps will be deleted, except files
- Nothing – Everything will be deleted; Settings, files, and apps.
8. Once done, click on the Install button. After installation is completed, you will be presented with the new Windows 11 OOBE screen.
Rollback
In the likely event that Windows 11 has magnificent features…and significant issues, this part of the guide will show you how to roll back to Windows 10. So, if you gave in to the temptation and updated to Windows 11 but the now less-than-great experience makes you regret your decision, don't worry, you can follow the steps given below to revert back to Windows 10.
Rollback via Windows Settings
You can easily roll back to Windows 10 in the first 10 days after you upgraded to Windows 11. However, you need to make sure not to get rid of the old installation files, which get listed as Temporary files in Storage settings.
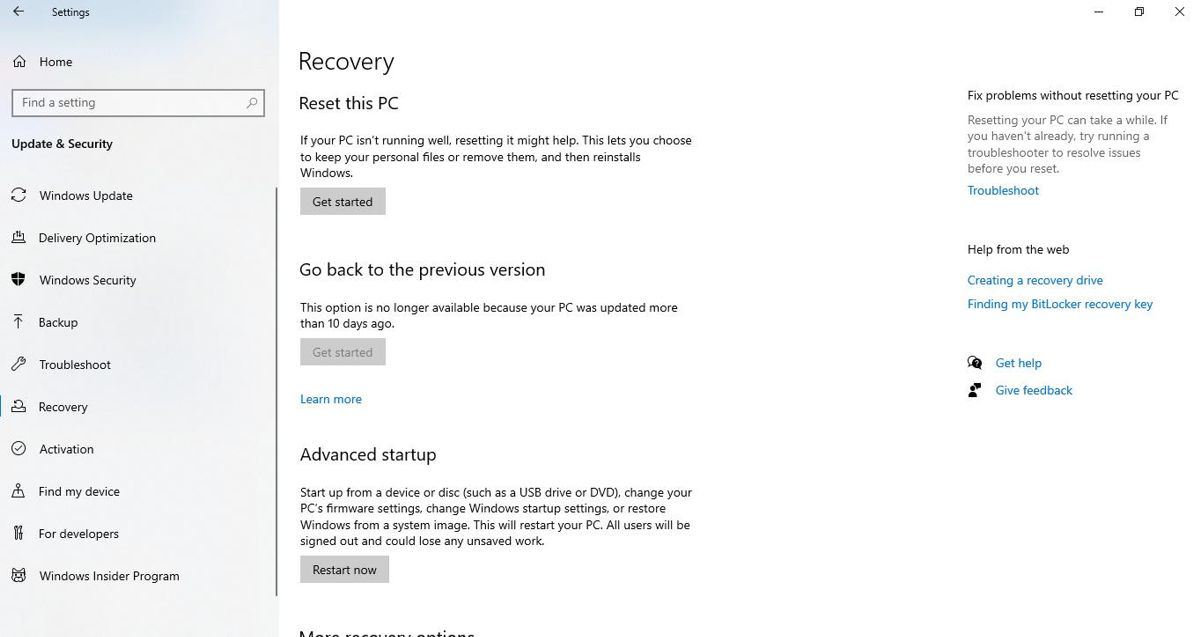
1. Open Settings and go to Update & Security and click Recovery.
2. Click on Get started under Go back to the previous version.
3. Accept all the warnings by Microsoft to begin the rollback process.
Once the reversal process is completed, you will have rolled back to your old build of Windows 10. Easy right?
